In today’s guide, you’ll see how to turn a text into a video for free in 7 simple steps using AI.
So if you want to make YouTube videos without showing your face or create engaging videos for your business, then you’re in the right place.
Table of Contents
Text To Video Tools
For the purpose of this tutorial, we’re going to be using Pictory AI, which is one of the best text-to-video maker.
This has become a favorite for a lot of people who have left Vidnami because they do have a script-to-video option, which is very similar to what Vidnami offered.
There are many other AI video generators that will allow you to do that but Pictory is the easiest tool to turn text into video and they have a very generous free plan where you can create up to 3 videos without paying anything.
So, if you want to work along with me you can start your Pictory free plan.
Let’s get started.
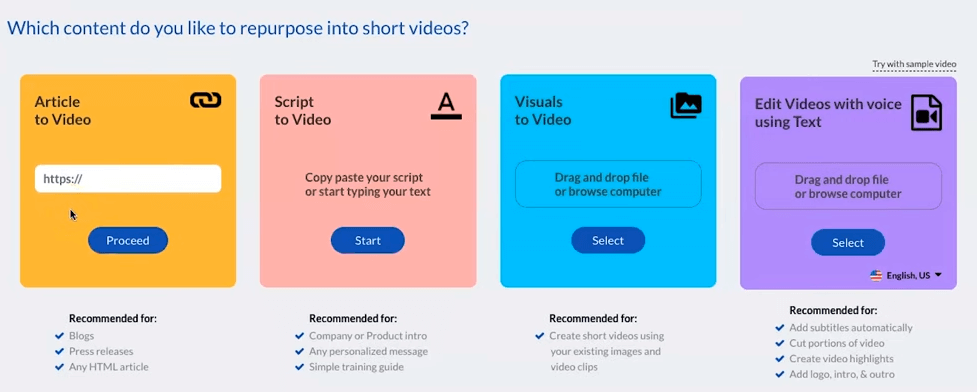
Step 1. Import Text
With Pictory you can convert text to video in two ways.
First, you can import the article by copying and pasting the URL of the article, and this will allow you to take the URL of a blog, a press release, or any other website, and it’s going to extract content from it and turn it into a video.
The second option is by importing your script which it’s going to take every piece of text and it’s going to create scenes using it, usually from sentences.
And for the purpose of this tutorial, we will choose the article to video tool that I generated using Jasper – the #1 AI copywriting tool.
So, let’s turn our blog post into a video.
First, grab a URL of the article you want to convert and paste it in the Pictory’ article to video tool.
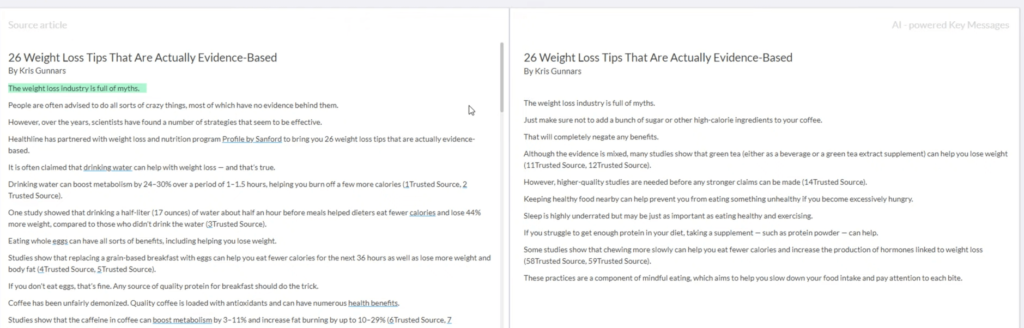
Now, we can see the article has been imported.
And on the left side, we can see pretty much the entire content from the article. On the right-hand side is what we’re going to be making our video from the content that was pulled from this article.
And what’s really neat is you have full control over which sentences or what content from the article shows up in your video.
Everything that’s highlighted in green is what is going to be added to the video.
And if you want, you can click the X and it’s going to remove it from what will be added to your video.
But if you see something that you want to add to your video, you can simply click on it and it adds it to your video.
The other thing is you can do with Pictory if you have a lot of filler words like “uh” or “um” in your script, you click “remove filler words” and it’s automatically going to remove it from the transcription, and it’s automatically going to cut it out of the video for you.
Here is a video tutorial on how to turn script to video using Pictory.
Step 2. Choose an Aspect Ratio For The Video
And then when you’re done, you can click on next, and then you can choose the size that you want your video.
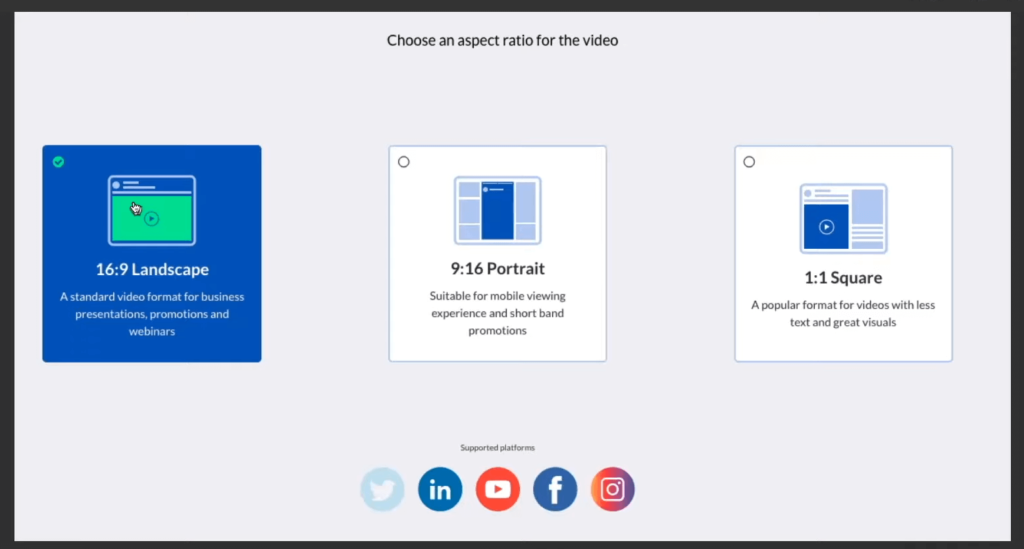
We’re just going to do landscape.
And then the AI will actually create everything and put it on your timeline really fast.
So this is going to be your page where you can edit your video.
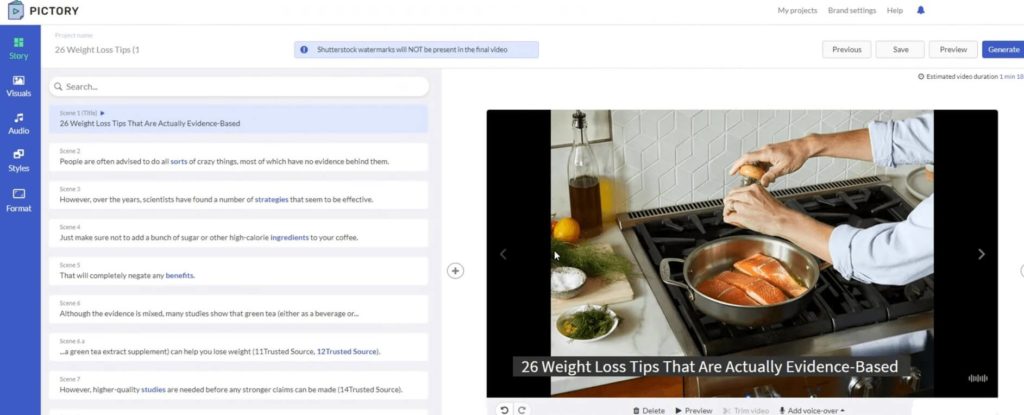
And so, this page looks the same, regardless of whether you do a URL to the video, or whether you do an article to video, you’ll end up on the video editor.
On the left-hand side, you’ve got all of your scenes, which break down every sentence into a new scene.
And it automatically pulls content from Storyblocks and Shutterstock to use for content.
What’s cool about Pictory AI is it does a better job than what AI video creators do for adding content and matching clips or images with the article.
Step 3. Edit Your Video
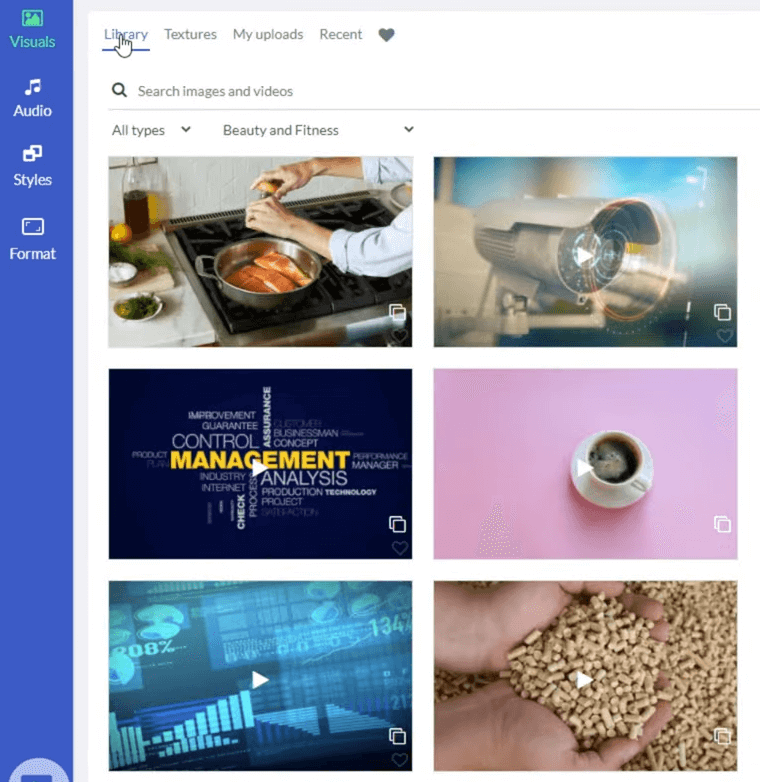
Next, you can come over to visuals and you can choose clips from the library.
From here you can choose a category or search by keyword where it’s going to give you all these different relevant videos that you can add simply by clicking on them.
Pictory offers a huge library of free images and video clips.
And then we can do that throughout each video; it’s super easy to do. Just click on a different video to replace it with whatever you want.
Now, there are a few other options if you want to take this a little further. You can go to textures, and textures have different background styles you can use for your backgrounds if you don’t want to use the videos or the images.
You can also upload your own or view the recent ones that you’ve added and also your favorites.
When it comes to adding or editing video scenes, you can simply do that by entering scenes before or after the slide you’re on.
They can be:
- Blank
- Text only
- Visual only
- Text and visual
Or a sub-scene to break it up, which is really neat.
Then, you can delete individual slides or scenes, you can preview them, you can trim the video. So, if it’s too long, you can shorten it.
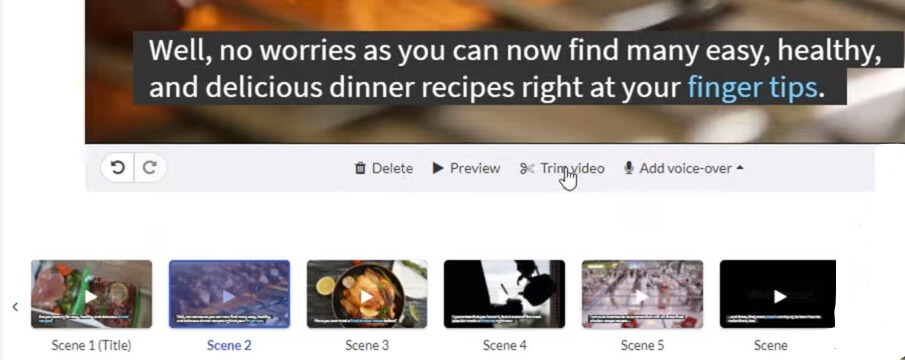
And then you can add individual voiceovers for your scenes if you want to do it that way too, or you can record your own voiceover.
And then under settings, you have the option per scene or actually per video to hide the text.
You can also choose “Apply to all” so it’ll apply it to the entire video instead of just one scene.
But really, the video editing is as simple as going back to your script-to-video, pasting in your script, clicking proceed, and then maybe changing out a couple of videos for your scenes, saving your video and you’re done.
Step 4. Choose Background Music
Then, we have an audio library where we can add background music.
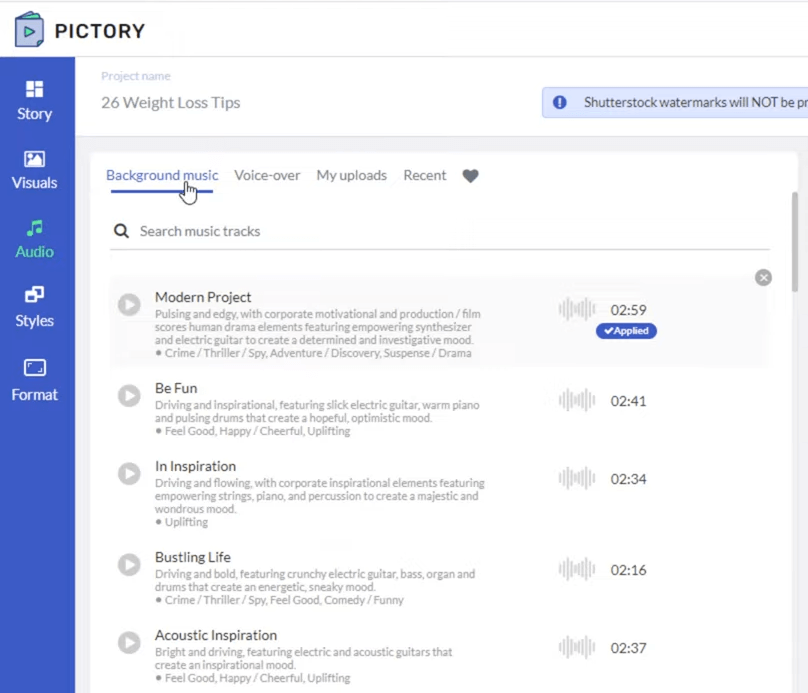
For audio, you can choose whether you want to have the background music or the voiceover to show up on it which we’ll take a look at in the next step.
When it comes to background music, you can listen to it by clicking the play button, and then if that’s what you want, you can click on apply and it’s going to add it to your entire video.
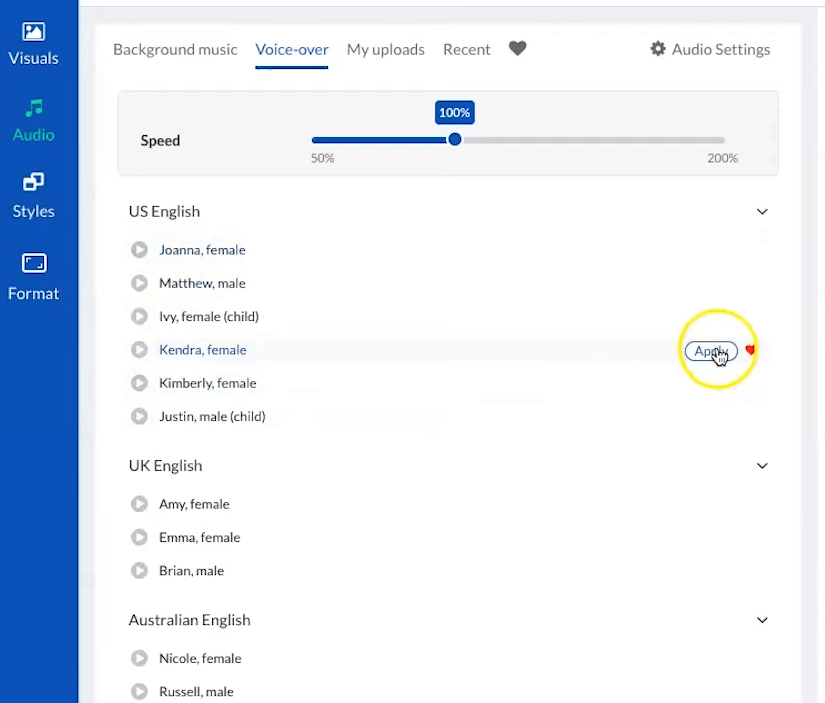
Step 5. Add Voiceover
Then it’s time to add a voiceover to your video. When it comes to voiceover with Pictory you have two options.
If you like you can upload your own audio file so this is cool because you can either record the audio yourself which is very good for Youtube and it’s going to match your voice to the text.
Pictory also allows you to choose from dozens of different AI voiceovers.
A lot of these are very similar to what Vidnami which was a software that also allowed users to transform text into video.
We have a few Indian, Australian, UK, and US voices and these are quite common voices that are used in multiple softwares.
But what’s cool about Vidnami is these AI voices don’t sound robotic compared to other AI video makers, which is great.
You also have control over the speed.
Step 6. Specify the Style of Your Video
Next, you can specify styles that show you the differences in how your text shows up on your video.
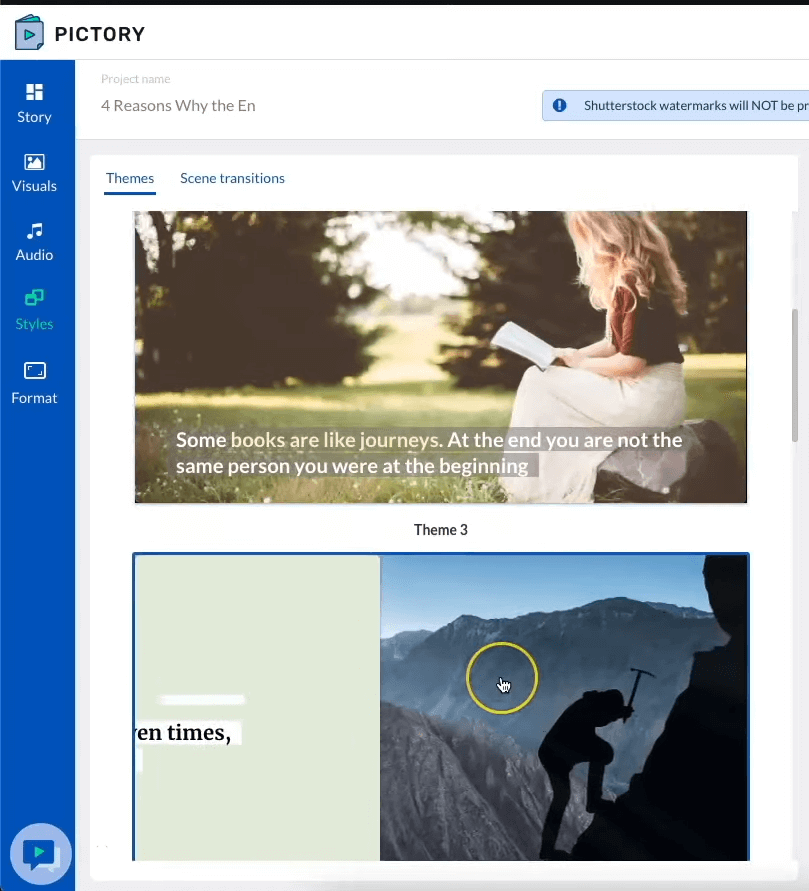
You can also set up your own brand settings so that you can change the colors and the backgrounds to meet exactly what you want.
So, you can change how your text shows up, what colors you want, what fonts you want, and all that under your brand settings.
Step 7. Generate Video
And then once you’re done, you can preview it and generate a video.
And just like with Vidnami, it’s going to go through this process of creating the scenes, and generating and optimizing the video.
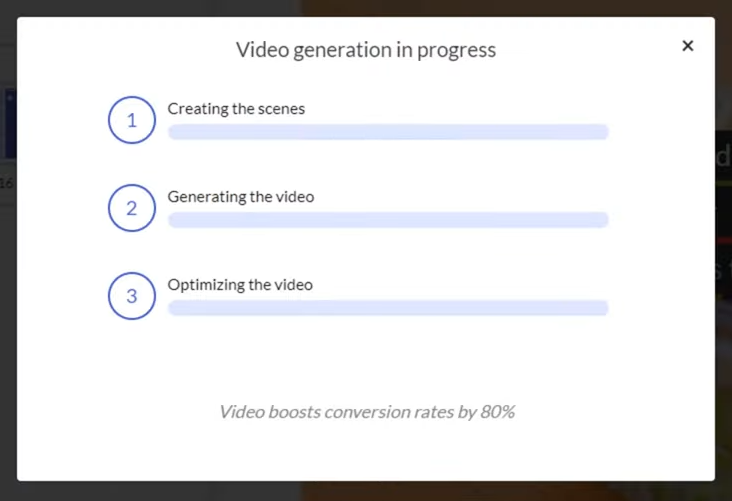
And then it’s going to send you an email to let you know that the video has been created and it’s going to be in your library.
Converting Text To Video Wrapping Up
So this is how you can simply convert text to video with this Pictory text to video maker.
It’s one of the easiest ways to create videos for your business, personal brand, or affiliate marketing videos.
As mentioned earlier the are many other text to video software with similar features InVideo, which is also a very beginner-friendly video maker that has a free plan.
I hope this tutorial was helpful to you. Thanks for reading!